The objective here is to build a 6-foot (1.83m) envelope just to learn how to build an envelope
using Mylar.
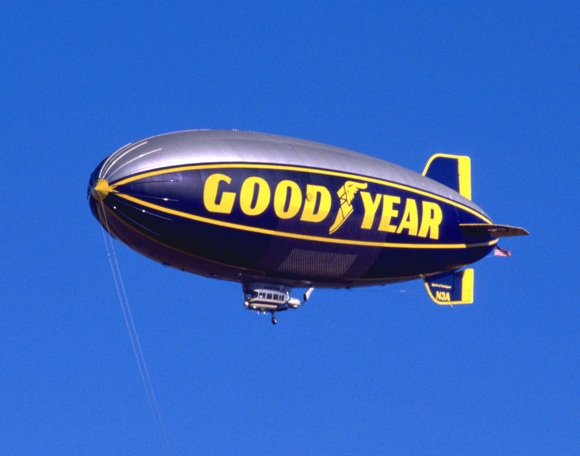
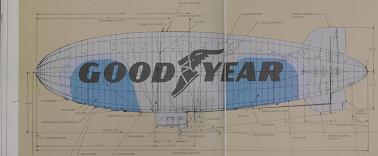
A photo of a blimp outline is used to get the basic blimp profile.
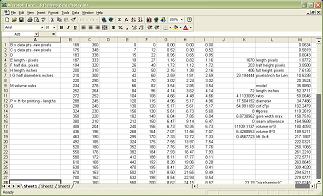
Using the photo in Microsoft Paint the outline in pixels can be obtained.
The raw pixel data are entered into a spreadsheet. There the pixels are converted
into inches based on the length of the model.
Data from the spreadsheet:
- 72 length inches(1.83m)
- 17.5 diameter inches(0.445m)
- 4.1 length/diameter ratio
- 54.99 max. circumference inches(1.4m)
- 8 #gores
- 6.87 gore width max. inches(17.45cm)
- 11109. volume in^3(182045.7cc)
- 6.43 volume ft^3(.1821m^3)
- 0.45 lift pounds(0.204kg)
The blimp half outline is obtained by plotting the X and Y
data from the spreadsheet.
Note: Hallmark gift wrapping paper makes good graph paper
as it has a 1 inch grid on the back. Also a scale with tens of an inch is very helpful.
The gore outline is obtained by exporting the X and Y values into a text file then importing
the values into a Visual Basic program that calculates the values around the blimp
profile.
Note:
The VB program calculates the hypotenuse of the triangle formed by the difference between
the X values and Y values using them as new values of X while calculating the gore widths
by calculating the circumference of the blimp at the original X and dividing it by the number of
gores (here 8). The new X values are calulated by:
New X = square root ((X30 - X31)^2 + (Y30 - Y31)^2) taking the point at 30 inches as an
example.
The code related to the visual basic program is here.
The data for this envelope is here.
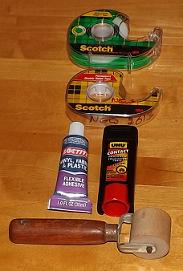
One-inch width strips of Mylar are cut from the Mylar for testing the best method of
joining the Mylar gores. The one-inch strips are tested by how much weight each seam
will support.
| Adhesive | seam type | cleaned by | breaking weight | comments |
| Double sided tape | overlap | acetone | 14 lbs (6.35kg) | 1/2" tape |
| Double sided tape | overlap | alcohol | 14.5 lbs (6.58kg) | 1/2" tape |
| Single sided tape | butt | acetone | 9 lbs (4.08kg) | 3/4" tape |
| Single sided tape | butt | alcohol | 8 lbs (3.63kg) | 3/4" tape |
| Single sided tape | butt | acetone-one side | 14 lbs (6.35kg) | 3/4" tape both sides |
| Single sided tape | butt | alcohol-one side | 14 lbs (6.35kg) | 3/4" tape both sides |
| UHU contact | butt | acetone | 9 lbs (4.08kg) | 3/4" Mylar strip overlay |
| UHU contact | butt | alcohol | 13 lbs (5.9kg) | 3/4" Mylar strip overlay |
| UHU contact | overlap | alcohol | 19 lbs (8.62kg) | 3/4" overlap |
| UHU contact | overlap | alcohol | 22.7 lbs (10.3kg) | 3/4" overlap |
| Loctite | butt | ? | 8 lbs (3.63kg) | 3/4" Mylar strip overlay |
| LocTite | butt | ? | 19 lbs (8.62kg) | 3/4" Mylar strip overlay |
| Loctite | overlap | alcohol | 12 lbs (5.44kg) | 3/4" overlap |
| LocTite | overlap | alcohol | 15 lbs (6.80kg) | 3/4" overlap |
| none | na | na | 32 lbs (14.5kg) | Mylar strip-no seam |
| none | na | na | 30 lbs (13.61kg) | Mylar strip-no seam |
In the above table, Loctite used is "Loctite Vinyl, Fabric, & Plastic Flexible Adhesive".
The UHU is "UHU Contact Power Glue", code 4823499115.
The double-sided tape is "Scotch Permanent Double Side Tape".
The roller was used to seat all the seams.
Seams as used in sewing were not considered; thought to be too weak in shear strength.
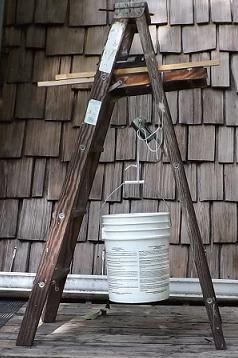
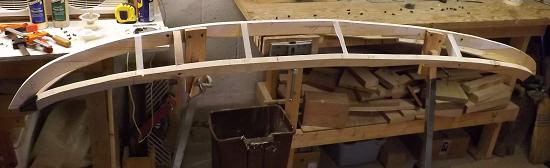
A framework is used to support the gores. The main frame member is in the center.
Two outriggers are added to support the gores while joining.
The main frame is narrow in height so that it may pass out through the ends on sealing
the final seam; see below.
The main frame member has a layer of double sided tape on it with a layer of Post-it tape
over that with the sticky side up to hold the film.
This is following Alan Sherwood's method. Be sure to see his thread at: http://www.rcgroups.com/blimps-62/
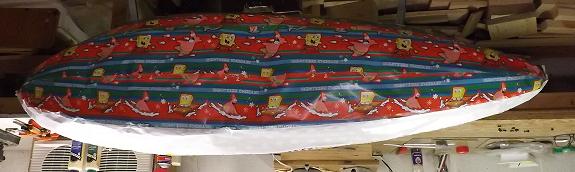
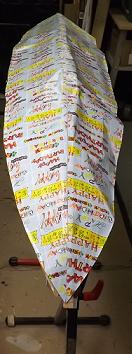
Yes I know what you are thinking: "What to hell is that?"
That my friends is the "Happy Birthday Sponge Bob blimp".
I was experimenting with assembling gores on the frame and used up some
old paper. The image is inverted here.
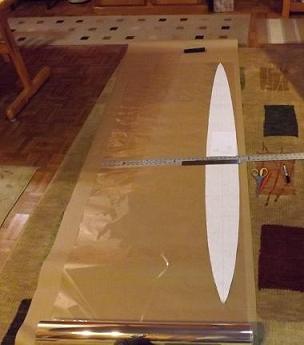
The Mylar gores can be cut from four sheets at once after tracing the gore
outline on to the top one. I found eight to be to many if you do not have much
excess material.
Note: You can staple the sheets together within the waste area to hold
them in place while cutting them out.
Note: When you add an overlap to the gore outline, you expand the width of the gore.
As you gain half of the overlap in width. If you have a 7" gore and you add a 1/2" to
each edge you would end up with 7 1/2" gore. You should add half an overlay to each side.
Butt joins do not need such considerations.
I am using Dupoint Mylar (polyester) base layer; it's 0.001 inch (25.4 micron) thick.
I started using UHU cement; one has to be careful not to get it on the Post-it tape.
Anyway, I also tried the double-sided tape. I could apply it more accurate but one has
to be careful with any uncovered edges inside the envelope.
I found that during the process of adding a gore to the completed section the Mylar
tends to track outward requiring one to stress the Mylar to get it to follow the seam
line. This can result in pleats in the Mylar. I blame this on the fact that the Mylar will not
stretch much when applied. I expect that with more experience the seams would be better.
The photo shows paper gores as I could not find a Mylar version.
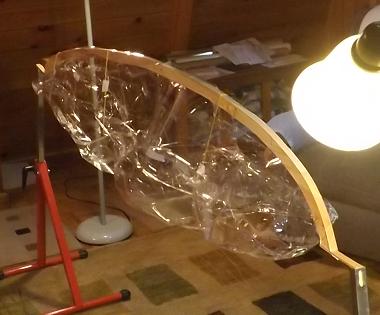
Closing up the envelope using only the main frame member. The frame is suspended at each
end with thin strips so that the fame can be extracted out through one end. The ends
are not completely sealed as I am adding end caps.
It's helpful to tie strings around the envelope in three or four places plus add tabs of Post-it
tape to secure the string to help stabilize the envelope while working with it at this stage.
I found that I could not remove the Mylar from the Post-it tape without pulling
it back at a low angle which I would not be able to do with the envelope closed.
Therefore, I removed the two layers of tape from the frame. I added a new strip of double
sided tape over which I laid one-foot lengths of waxed paper.
Using a small electric iron, I could stick the gore edge onto the frame.
I closed up the seam with double-sided tape. I could un-adhere the gore from the waxed paper
very easily. Very little or none of the wax was transfer onto the gore.
Before closing the seam, the end caps are placed inside the envelope loosely.
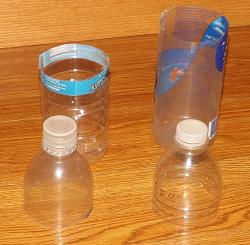
Closing up the envelope ends using water bottle upper sections for end pieces.
The bottle caps would allow access to the envelope for adding gas and purging air.
The end pieces are glued in place (after the ends of the envelope ends are trimmed)
using the Loctite cement as a liquid cement gives one more freedom in placing it
without getting it stuck to the inside of the envelope. You can rotate the bottle
ends while holding a small paintbrush loaded with glue onto its surface through
the openings.
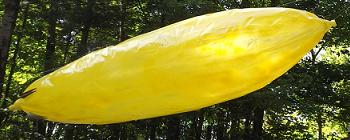
Look in the sky! It's a plane! It's a bird! It's a big banana!
Okay I could not resist adding some color else it would look like Wonder Woman's airplane.
I found that the envelope had a number of leaks related to the pleats. I overlaid the leaks
with the single sided Scotch tape.
My next envelope will be from Nylon as it can be heat-sealed.
Forward to Nylon