The objective here is to build a 10-foot (3.048m) envelope using nylon film
with the idea to make a rc model blimp with it.
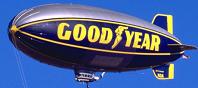
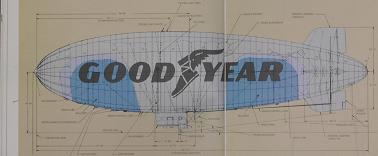
A photo of a blimp outline is used to get the basic blimp profile.
Using the photo in Microsoft Paint the outline in pixels can be obtained.
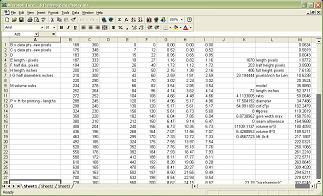
The raw pixel data are entered into a spreadsheet. There the pixels are converted
into inches based on the required length of the envelope.
Data from the spreadsheet:
- 120.........length inches (3.048m)
- 29.17.....diameter inches (0.741m)
- 4.11........length/diameter ratio
- 91.65.....max. circumference inches (2.33m)
- 8............#gores
- 11.46.....gore width max. inches (29.11cm)
- 51443.7...volume in^3 (0.8430m^3)
- 29.77.....volume ft^3 (0.8430m^3)
- 2.115.....lift pounds (0.959kg)
The blimp half outline is obtained by plotting the X and Y data from the spreadsheet.
Note: Hallmark gift wrapping paper makes good graph paper
as it has a 1 inch (2.54cm) grid on the back. Also a scale with tens of an inch is very helpful.
The gore outline is obtained by exporting the X and Y values into a text file from the spreadsheet
then importing the values into a Visual Basic program that calculates the values around the blimp
profile.
Note:
The VB program calculates the hypotenuse of the triangle formed by the difference between the
the X values and Y values using them as new values of X while calculating the gore widths
by calculating the circumference of the blimp at the original X and dividing it by the number of
gores (here 8). The new X values are calculated by:
New X = square root ((X30 - X31)^2 + (Y30 - Y31)^2) taking the point at 30 inches as an
example.
The code related to the visual basic program is here.
The data for this envelope is here.
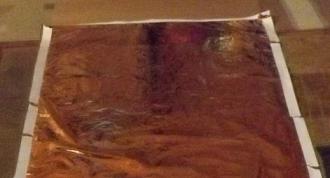
The nylon used here has one side coated such that it may be heat sealed; that is
the aluminum colored side in the photo. The other side is silver in color and would be the outside
of the envelope.
The question is which way to join the seams. The choices are:
1: Make all the seams outside seams like mylar balloons. Easy to construct. Does not require a frame.
Easy to close up the envelope. Outside is the silver color.
2: Overlap the seams. Alternating aluminum and silver on the outside. More difficult to construct. Requires a frame.
More difficult to close up the envelope.
3: Butt join the seams and use an overlay strip on the outside. The outside is all aluminum except for the
overlay strips. Requires a frame. Closure is more difficult.
4: plus other methods.
Well I am thinking I will go with the seams on the outside this time. I have gone the frame route before and
that is a lot more work.
The nylon film used here is: Bioriented Coextruded Nylon/EVOH/Nylon/Polyethylene - Polyolefin Coated Metallized Film.
from: https://secure.beyondthenet.com/~balloon/pages/catalog.html
This plastic, because of the heat sealing coating only on one side, is very prone to curling up.
If one cuts out a single gore, you end up with a tube about one inch (2.54cm) in diameter in the center
and with pointy ends. It is important to stabilze the edges such that they do not curl inward.
If not you will, as I did on my first gore, spend hours laying it out on top of the next surface
and taping it down with Post-it tape!
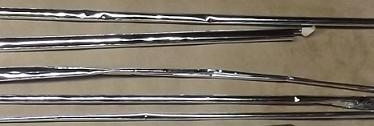
The photo shows cutoffs that have curled up.
To stabilize the edges you can use a strip of masking tape along the edges of the plastic.
I used 1.5 inch (3.81cm) masking tape here but 0.75 inch (1.9cm) later.
The dis-coloring in the photo is due to reflections.
The first step in making pairs of gores is folding the plastic sheet such that the aluminum colored sides are
together. Then traceing the gore outline on to the silver side leaving enough plastic for the
seam at the taped edges. If one seals the folded edge first that leaves the open edges already taped.
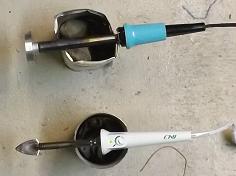
The photo shows a small iron used by quilters; it has a temperature control on it that is necessary.
Also shown is a rolling sealer made from a 80 watt soldering iron, a bolt, and an aluminum disc
(perhaps one could use a number of large washers). It would work better if one had a bolt with
a 90 degree bend in it so it could push it back and forth easier. I snapped off two bolts trying
to bend them close to the threads.
The temperature is controlled by using a light dimmer control.
Note the fancy holders make from cans with notches cut into them!
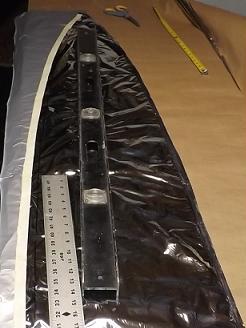
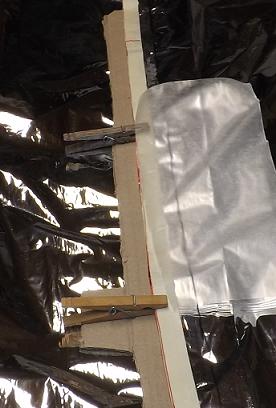
The right edge is sealed and trimmed. The left upper edge has masking tape applied that helps define the edge.
When joining one gore pair to another the masking tape on the lower one defines the edge of that gore. Therefore
the masking tape must be put on reasonably accurate. I marked out from the envelope drawn edge points 0.5 inch (1.27 cm)
and 1.25 inch (3.175 cm) and put the tape between them.
After the four pairs of gores are finished, they are joined together by clamping the edges of
each pair together. Once sealed the tape is trimmed off.
Here the masking tape edges are aligned and held by cloths pins. Waxed paper covers the nylon as it
is being sealed. Note the envelope edge seen as a black line through the waxed paper. There is 0.5
inch (1.27 cm) between the edge of the envelope and the masking tape for sealing.
A strip of cardboard is under the area being sealed; it gives a solid surface to work on and helps keep
the under lying nylon out of the way.
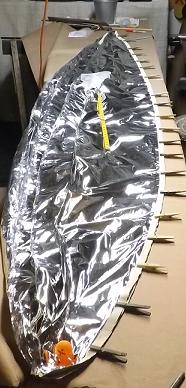
A photo of sealing the last seam on the envelope
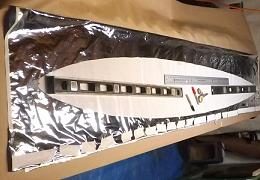
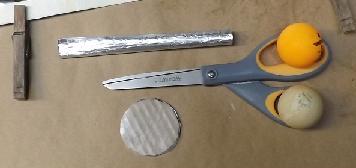
A disk and fill tube. A means to inflate the envelope is required; this can be a tube formed from the nylon and sealed
into the envelope at some spot before the final closue. A cardboard disk covered with waxed paper
is sealed into the envelope. The disk can be used for making repairs or adding attchments if required later.
If placed under the area of interest it keeps the far side of the envelope from being attached accidentally.
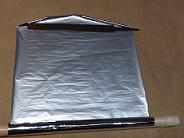
The tube can be constructed by winding a layer of waxed paper over a dowel then winding nylon over
the waxed paper. Tack the tube by heat sealing the nylon as you wind it up. I found it is best to wind the
tube with the aluminum colored surface outward not as in the photo.
To complete the envelope the bow and stern ends need to be sealed. These ends are zones of maximum confusion
as the 8 gores converge onto this area plus the seams making it a difficult area to work at. At each end I left a
6 inch (15.24 cm) open gap in the closing seam about 4 inches (10.16 cm) back from the ends to work through.
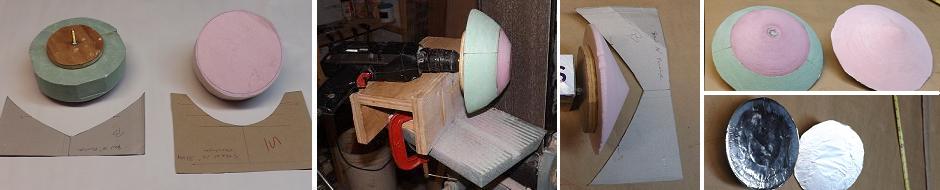
Using the blimp half profile outline, seen above, I made cardboard templates to use in turning
foam 'bowls' to use as seals.
Foam blocks are cut into disks and the foam disks have wooden disks, containing bolts, glued to them.
Mounted into a drill motor and spun against a moving belt sander the seals can be shaped into a bowls that
are close approximations to the templates. The center area of the disks are removed using a heated spoon
to complete the seal.
The back surfaces are sealed with layers of nylon and sealant.
One-inch width strips are cut from the nylon film for testing various adhesives and sealants.
In the table "silver to silver" and "aluminum to silver" refer to which surfaces are being joined.
The aluminum colored side does not heat adhere well to the silver colored side.
The sealants Loctite Clear Silcone Sealant, 3M Scotch Weld-Neoprene, and Z Vent Sealant adhere well
if used as sealants. That is if they are applied to one surface of the silver colored surface such
that they are exposed to the air.
| Adhesive | Ashesion | Comments |
| Scotch Double Sided Tape | good | silver to silver |
| Scotch Double Sided Tape | good | aluminum to silver |
| UHU Contact Powerglue | some | silver to silver |
| UHU Contact Powerglue | some | aluminum to silver |
| Loctite Flexible Adhesive | very little | silver to silver |
| Loctite Flexible Adhesive | very little | aluminum to silver |
| Testors Plastic Cement | none | silver to silver |
| Testors Plastic Cement | none | aluminum to silver |
| Scotch Max. Str. Adhesive | very little | silver to silver |
| Scotch Max. Str. Adhesive | very little | aluminum to silver |
| Gorilla Super Glue | poor | silver to silver |
| Gorilla Super Glue | poor | aluminum to silver |
| Gorilla Glue | | silver to silver |
| Gorilla Glue | | aluminum to silver |
| Devcon 5 Minute Epoxy | poor | silver to silver |
| Devcon 5 Minute Epoxy | poor | aluminum to silver |
| Loctite Clear Silcone Sealant | good | silver to silver |
| Loctite Clear Silcone Sealant | very little | aluminum to silver |
| Z Vent Sealant | poor | silver to silver |
| Z Vent Sealant | poor | aluminum to silver |
| 3M Scotch Weld-Neoprene | some | silver to silver |
| 3M Scotch Weld-Neoprene | some | aluminum to silver |
For the stern end the foam seal is coated with sealant and inserted into the envelope and weighted while it is hanging vertical.
After the sealant sets, a 4.5 inch (11.43 cm) disk of nylon is heat sealed over the outside envelope area
covering the end.
For the bow the (all pink) foam seal is covered with a layer of heavy paper using glue. The seal
is inserted dry into the envelope and heat-sealed in place. Like the stern a 4.5 inch (11.43 cm) nylon disk
is added also.
The photo is rotated 90 degrees here. It is nice having a high ceiling!
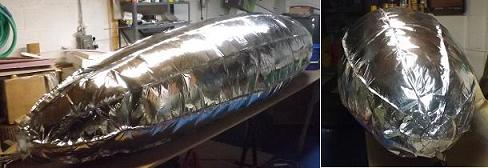
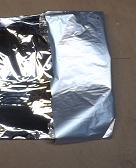
After sealing in the fill tube and closing up the gaps the envelope is completed.
At three seams 8 inchs (20.32 cm) of the tape and nylon, that would normial be cut off, are left as a possible
anchors for decorative fins.
Plus at the closing seam the tape and excess nylon are left on as possible attachement points.
Perhaps for the gondola and anchor lines. It is easier to remove it later than have to add something later.
The envelope weighs about 8.5 oz. (241 g).
Conclusions;
- Nylon is much easier to seal than mylar.
- Nylon is more difficult to handle due to its curling up.
- Sealing the ends of the envelope is a very iffy task at best. A better way?
- It would be much faster and much easier to make a two gore envelope like a balloon.
- My next envelope will be made with two gores. It is too much work making an eight-gore envelope!
- See the polyethylene link below for a two-gore envelope.
I will add a link to a new page when I finish making an RC blimp from the envelope.